Recently I was working on appointment tracking for one of my clients. It was a massive headache. They were on Shopify, an excellent platform for ecommerce but useless for appointments. You need third-party plugins to make appointments work.
I was sharing with my friend Korir from Custom Writing Pros about this recently. He suggested that I write about this as it was a common problem for Shopify businesses that rely on appointments instead of straight sales.
Hence, I put together this guide for Shopify business owners who cry out for a viable appointment-booking solution that plays well with Google Analytics.
In order to get started, we will need to have an account for the following software tools.
- Shopify
- Google Analytics
- Appointlet (Our chosen appointment-booking tool)
I also assume that you already have Google Analytics and Shopify integrated. If you haven't, you can find a terrific guide here.
In this guide, we will have to do some groundwork before we can integrate the 3 different pieces above. First of all, we have to install Appointlet into our Shopify store. Thereafter, we have to customize our Shopify store template so that appointments made will be reported to Google Analytics. Lastly, we will have to test our setup to verify that everything works.
Appointlet Installation (section 1 of 3)
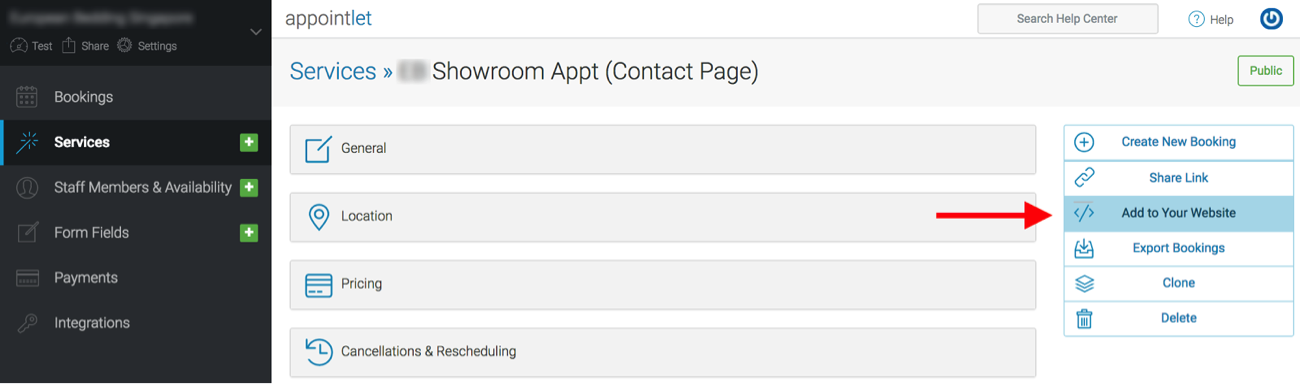
To install the Appointlet on your Shopify store, you must first create and configure an Appointlet service. A complete step-by-step guide to setting up your appointlet service can be found here. Once completed, Click “Add to Your Website” menu on the right-pane.
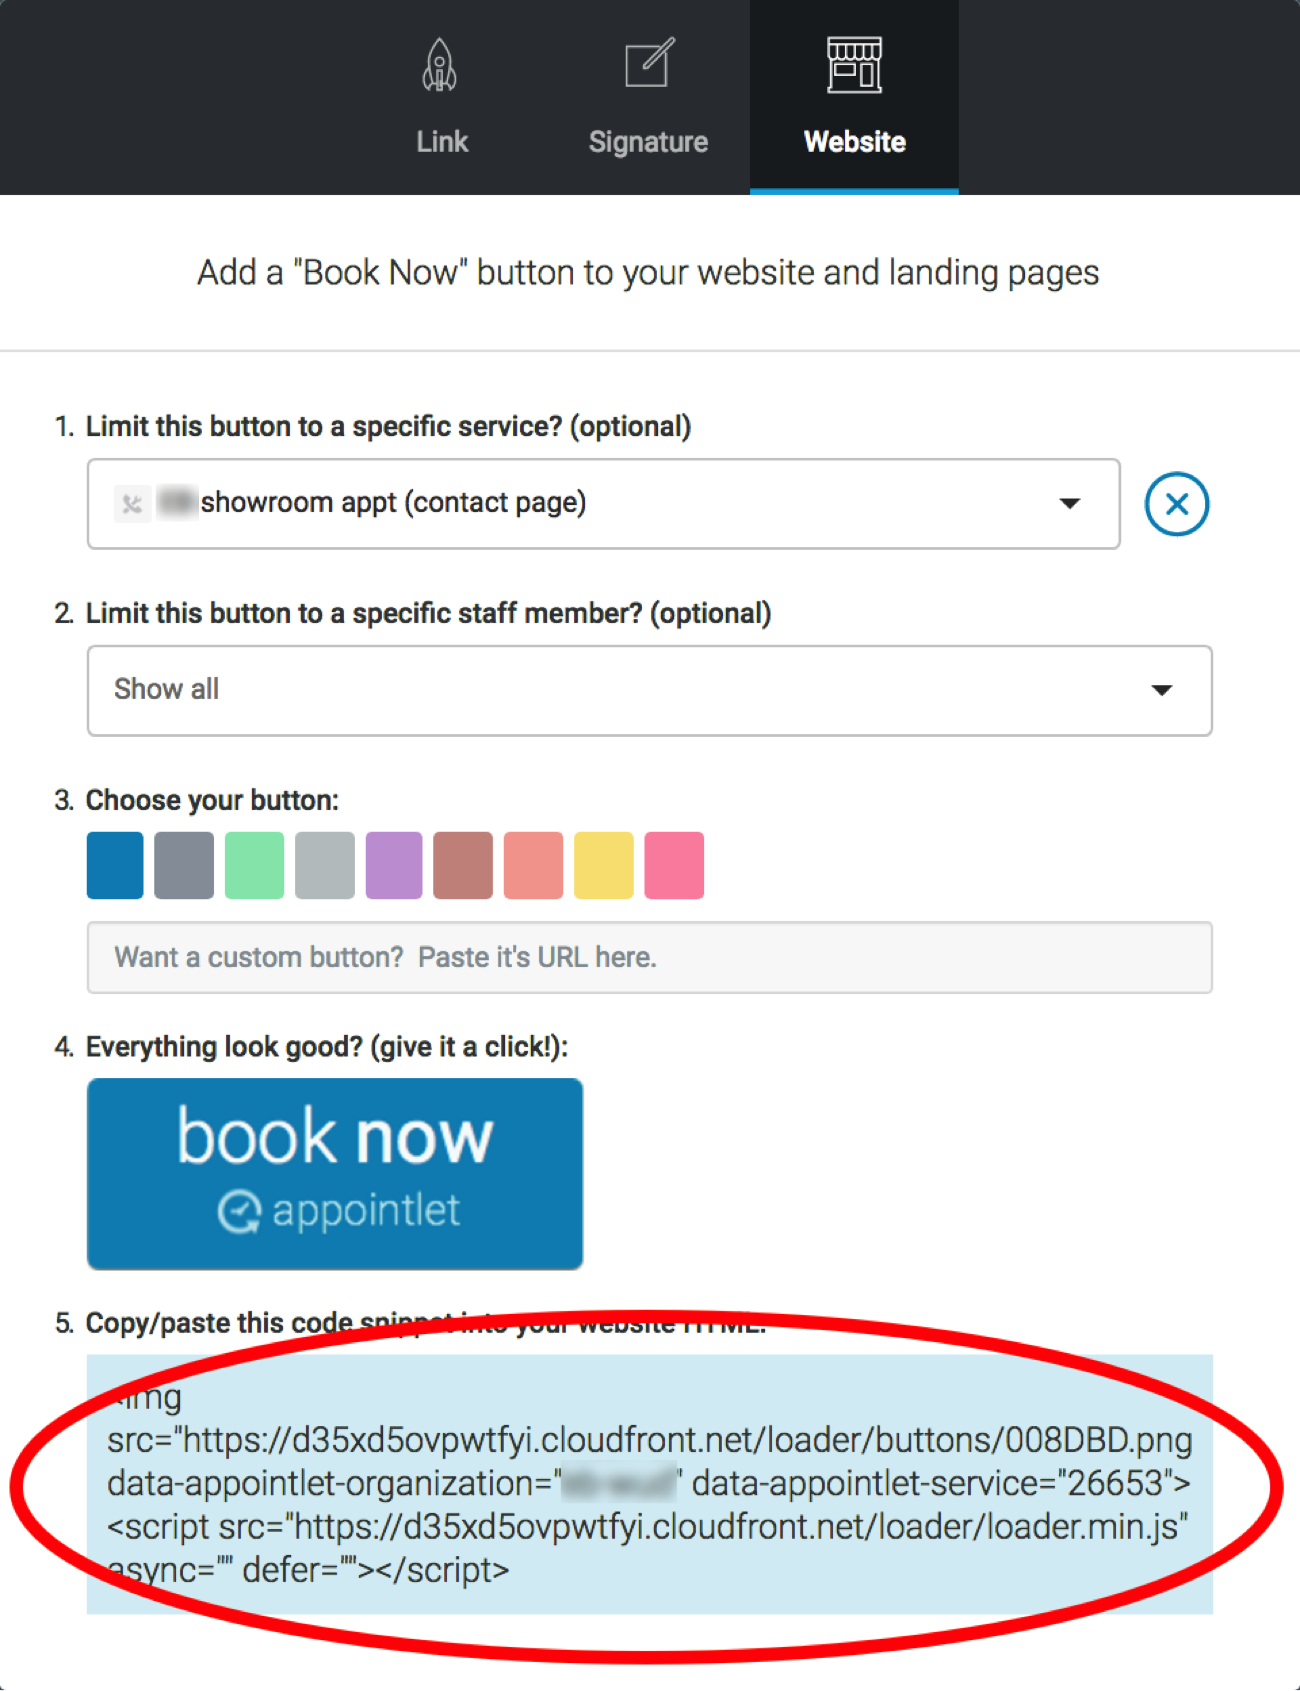
Copy the HTML code snippet from “Add to Your Website” popup shown above.
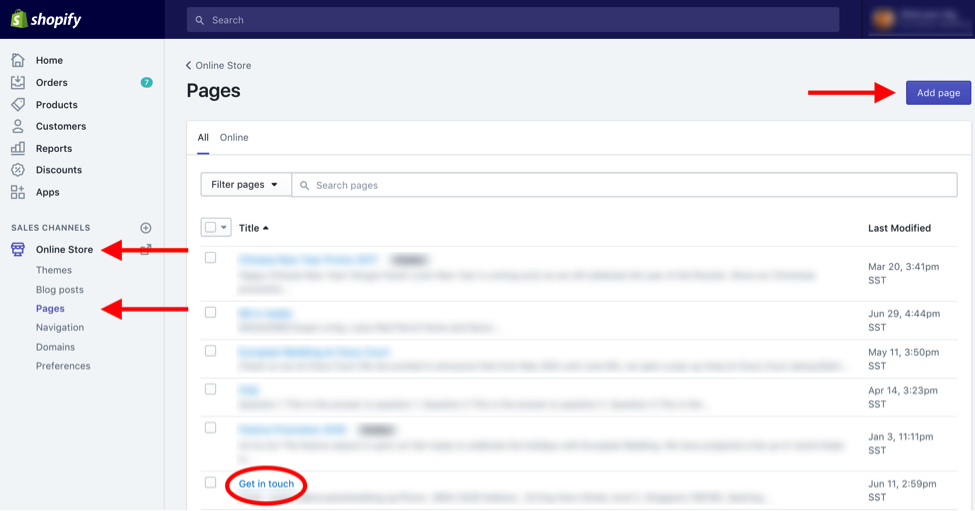
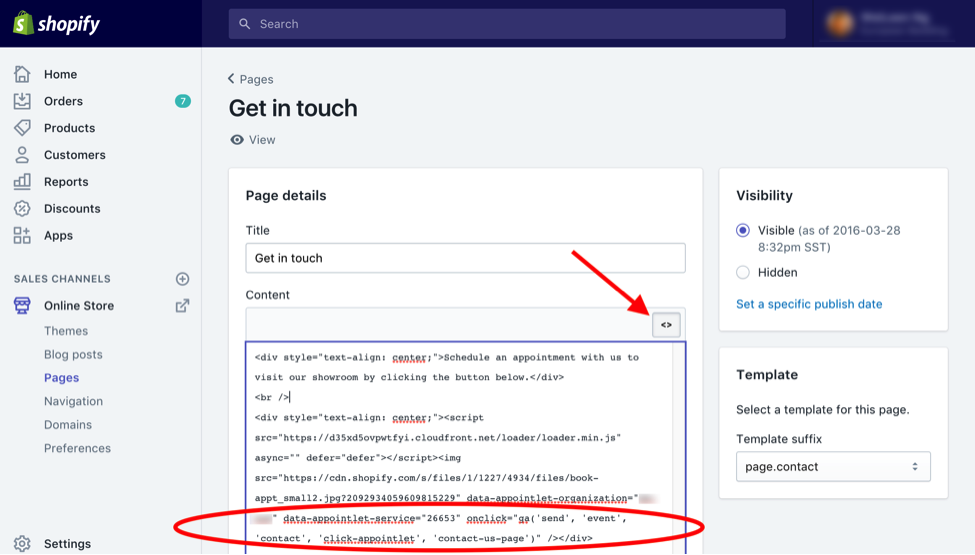
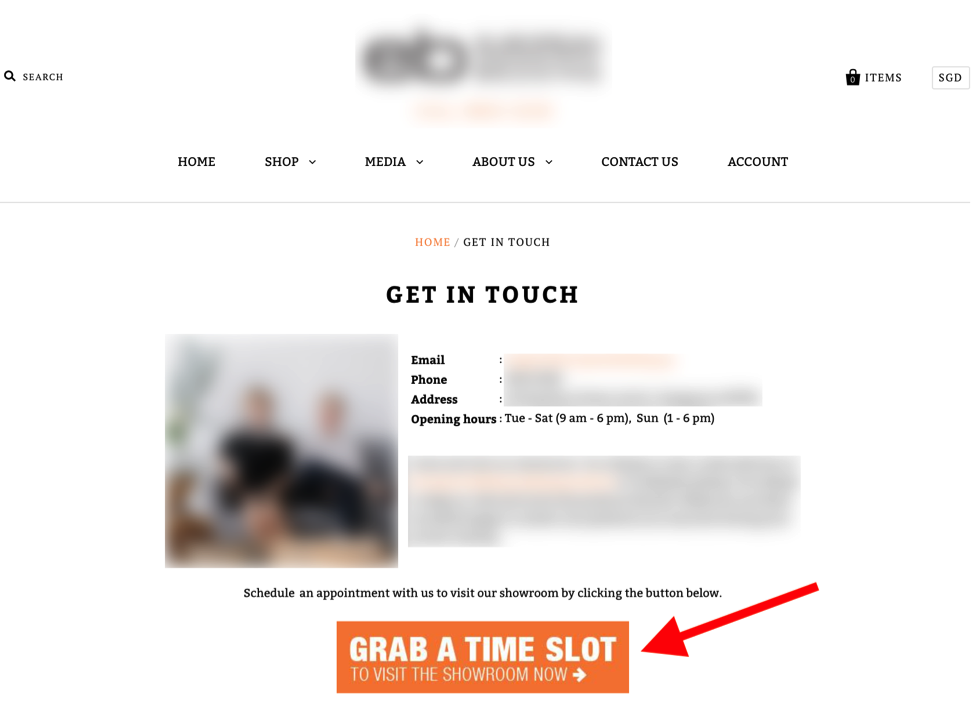
In Shopify, go to Online Store -> Pages. If you have a ‘contact’ page, open it (my contact us page is Get in touch). If none has been created, click “Add page” at the top right of the screen to create a new contact us page. If there is another page that you want to place the appointlet widget on, open that up instead.
In the contact us page, click the show html button <> to show the html code for the page. Paste the copied HTML code snippet from Appointlet at the end of the page’s html code as shown in the screenshot below.

Tracking Clicks On Appointlet (section 2 of 3)
Now that appointlet is installed on your Shopify store, we need to keep track of its usage. To do this, we will need to record each click on the appointlet widget that has been embedded on the contact us page. We can do so by capturing each click on the appointlet widget as a goal in Google Analytics.
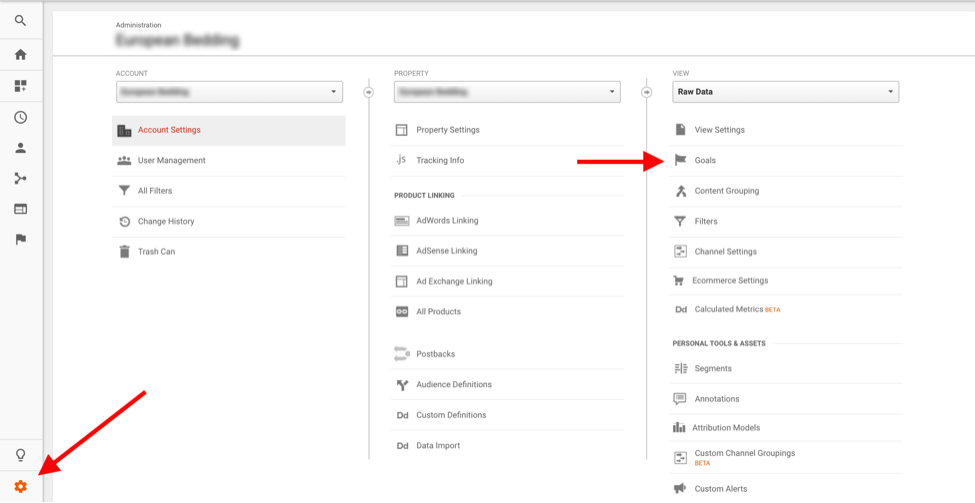
We will start by creating a Google Analytics goal. After that, we will create an event tracking code snippet based on the goal created. First, click the Admin button at the bottom-left and select Goals.
Goal Creation In Google Analytics (i of iii)
To create a Goal in Google Analytics, click the bright red +NEW GOAL button.
In the next screen, which is the first step of Goal setup, select the Custom goal type (last option) and click continue. Now, give the goal a name. Then, select type “Event” and continue.
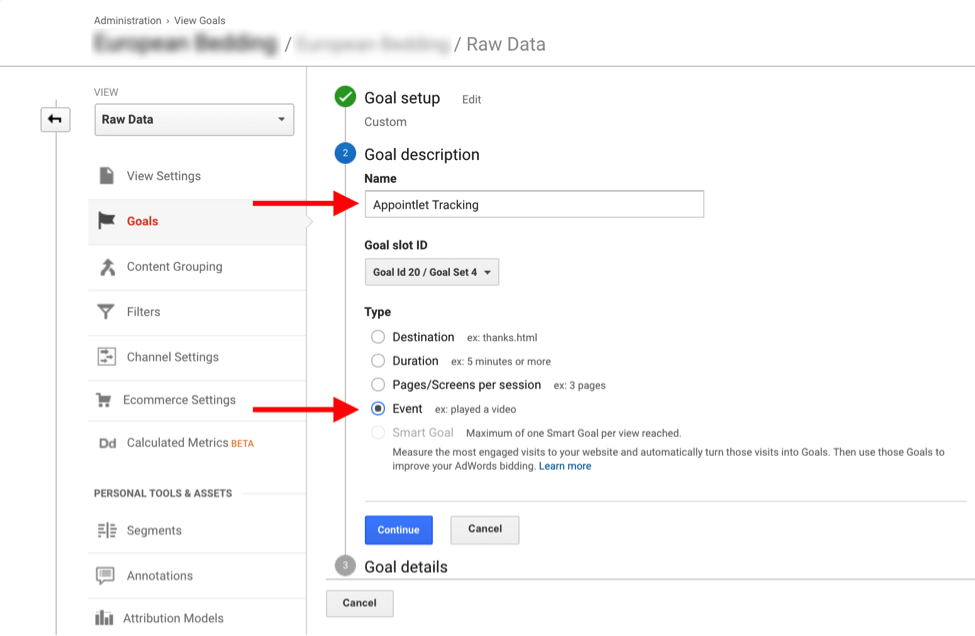
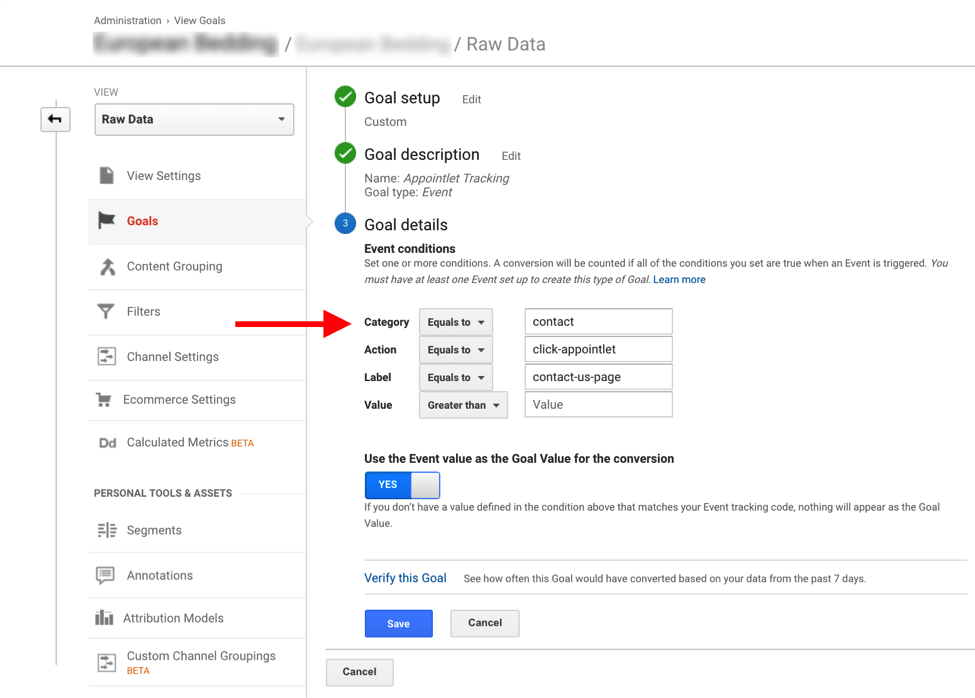
Enter the following values to their respective fields and save. Take note of these parameters as they will be required in the next section.
| Category | contact | | Action | click-appointlet | | Label | contact-us-page |
Once completed, it should look like following screenshot. More info on setting up the event tracking code can be found here.
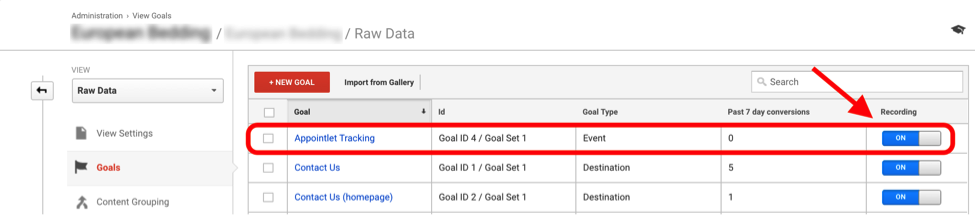
Lastly, turn on “Recording” above to start tracking the clicks of the appointlet button.
Appending Google Analytics Javascript Snippet (iii of iii)
Once the goals and event tracking code has been created, we need to put the event tracking code in its proper place. In order to do that, open up the contact us page for editing, as we had done in the Appointlet Installation section above. Then, paste the following tracking code after the appointlet-service as shown in the screenshot below.
onclick=”ga(‘send’, ‘event’, ‘contact’, ‘click-appointlet’, ‘contact-us-page’)
Testing Your Setup (section 3 of 3)
To test your setup, trigger the event by clicking on the Appointlet button embedded on the contact us page.
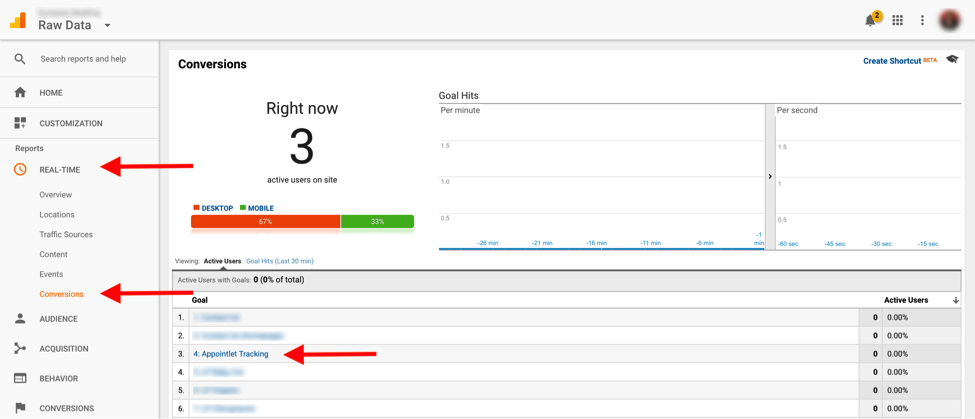
In Google Analytics, I recommend using the REAL-TIME Conversions report (screenshot below) to verify conversions of the last 30 minutes instead of the Conversions - Goals - Overview report. This is because, Google Analytics can take up to a few hours before the metrics is updated in the reports.
There you go! With the setup above, you ought to be able to see how many users click on the appointlet widget to book an appointment with you. With some segmentation in Google Analytics, you can see this for segments such as Organic Search, PPC, social media and more. Happy tracking!